Seeing “Input Not Supported” on your Acer monitor can be frustrating. This error means your monitor cannot display the signal from your computer.
Don’t worry; this issue is common and fixable. Understanding the causes and solutions helps you get your monitor working again. Sometimes, the problem is due to incorrect resolution settings or outdated drivers. Other times, it might be a simple connection issue.
This guide will walk you through easy steps to resolve the “Input Not Supported” error. From adjusting display settings to checking cables, you’ll learn how to troubleshoot and fix the problem efficiently. Keep reading to get your monitor back in action.

Credit: www.youtube.com
Common Causes
Encountering the “Input Not Supported” message on your Acer monitor can be frustrating. This message usually means your monitor is having trouble displaying the input signal. Understanding the common causes can help you resolve the issue quickly.
Resolution Issues
One common cause is resolution issues. Your computer might be set to a resolution higher than your monitor can handle. This mismatch creates display problems. Check the resolution settings on your computer. Set it to the recommended level for your Acer monitor. This simple step often solves the problem.
Refresh Rate Mismatch
Another common cause is a refresh rate mismatch. Monitors and computers need to sync their refresh rates. If they don’t match, your monitor may not display properly. Check your computer’s display settings. Ensure the refresh rate matches the monitor’s capabilities. Adjust if necessary. This can resolve the “Input Not Supported” error.

Credit: www.drivereasy.com
Check Monitor Cables
Ensure all cables are properly connected. Sometimes, a loose or damaged cable can cause the “Input Not Supported” error on Acer monitors. Adjust the monitor settings if needed.
When your Acer monitor displays the message “Input Not Supported,” it can be frustrating. One of the first things you should do is check your monitor cables. Ensuring they are correctly connected and in good condition can often resolve the issue quickly.Inspect Connections
Start by turning off your computer and monitor. Unplug all cables connecting the monitor to your computer. Carefully inspect each cable for any signs of wear or damage. Look for bent pins or frayed wires, as these can cause connectivity issues. Reattach the cables firmly, making sure they are securely connected to both the monitor and the computer. Turn your computer and monitor back on to see if the issue persists.Replace Faulty Cables
If inspecting the connections didn’t help, you might have a faulty cable. Try using a different cable to connect your monitor to your computer. Borrow one from a friend if you don’t have an extra at home. If the message “Input Not Supported” disappears, you’ve identified the problem. Invest in a good-quality replacement cable to avoid future issues. Have you ever thought about how much of your work depends on a clear monitor display? Don’t let a simple cable issue disrupt your productivity. Check your monitor cables today and save yourself from unnecessary frustration!Adjust Display Settings
If your Acer monitor says “Input Not Supported,” adjusting the display settings can help. Incorrect settings often cause this error. You can change resolution and refresh rate to fix the issue. Let’s explore how to do this.
Change Resolution
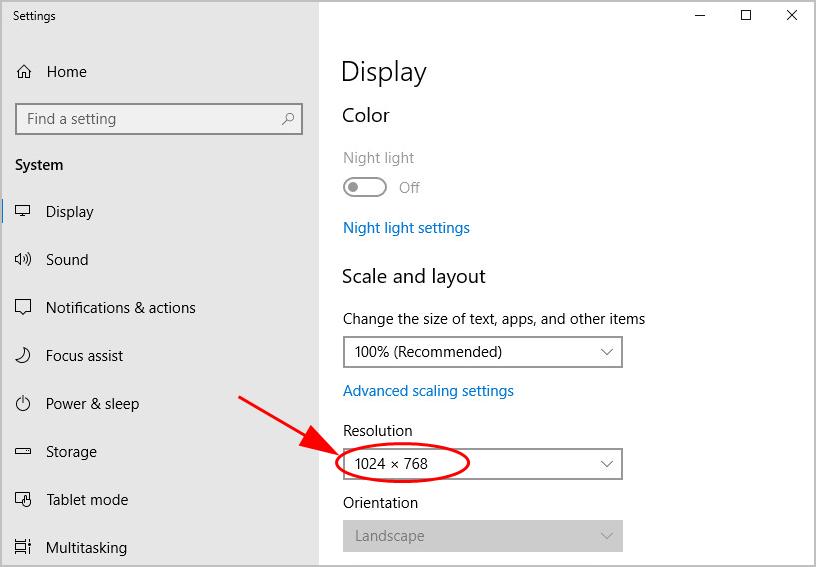
Changing the resolution can solve the “Input Not Supported” error. Right-click on your desktop and choose “Display settings”. Look for the “Resolution” option. Select a resolution that matches your monitor’s native resolution. Click “Apply” and confirm the changes.
If the error persists, try different resolutions. Sometimes, finding the correct resolution takes a few attempts. Ensure the resolution is within your monitor’s supported range.
Modify Refresh Rate
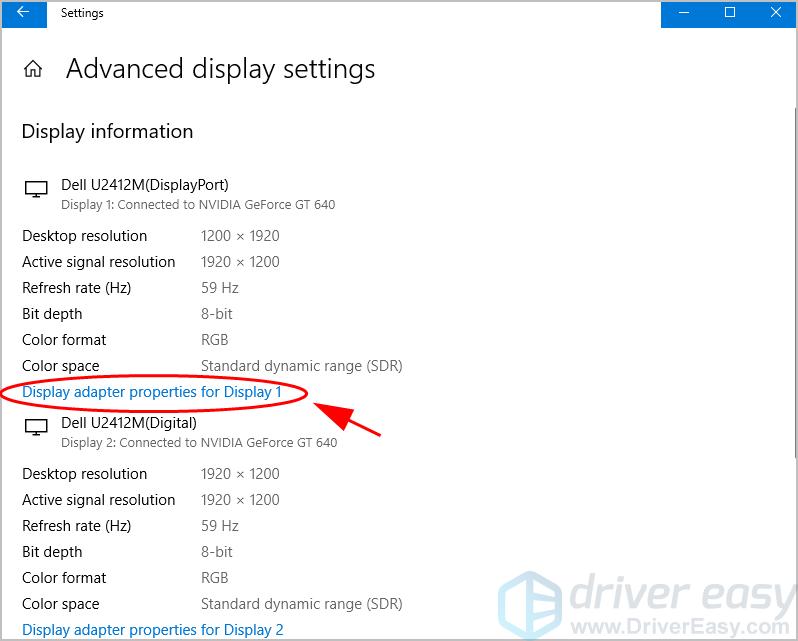
Another solution is modifying the refresh rate. Go back to “Display settings”. Scroll down and click on “Advanced display settings”. Look for “Refresh rate” and select a rate supported by your monitor. Common rates are 60Hz or 75Hz.
Click “Apply” to save the changes. Confirm the new refresh rate. If the error still appears, try a lower refresh rate. Avoid high rates your monitor cannot support.
Adjusting these settings can often resolve the “Input Not Supported” issue. Always ensure your settings match your monitor’s capabilities.
Boot In Safe Mode
Booting into Safe Mode can fix monitor issues. Access Safe Mode by restarting your computer and pressing F8 before Windows starts. Adjust screen resolution to match Acer monitor specifications.
When your Acer monitor displays the message “Input Not Supported,” it can be frustrating. However, booting in Safe Mode can be a simple solution to this problem. Safe Mode starts your computer with only the essential programs and drivers, allowing you to troubleshoot and fix issues without interference from other software.Access Safe Mode
To access Safe Mode, first restart your computer. As it boots up, press the F8 key repeatedly until the Advanced Boot Options menu appears. Use the arrow keys to navigate and select “Safe Mode” by pressing Enter. Safe Mode can be a lifesaver. It loads only the necessary drivers and bypasses potential conflicts. Once you’re in, you can start addressing the “Input Not Supported” error.Adjust Settings In Safe Mode
Once in Safe Mode, right-click on the desktop and select “Display settings.” Here, you can change the resolution to match your monitor’s native resolution. For instance, if your monitor supports a resolution of 1920×1080, make sure this is set. Incorrect resolution settings are a common cause of the “Input Not Supported” error. Apply the changes and restart your computer normally. This simple adjustment often resolves the issue. Have you tried Safe Mode before? It’s a powerful tool that can fix many computer problems, including display issues. Give it a shot and see if it works for you.Update Graphics Drivers
Updating graphics drivers can resolve many display issues with your Acer monitor. If your monitor says “Input Not Supported,” outdated or incompatible graphics drivers might be the cause. Updating drivers can restore display functionality and enhance performance. Follow these steps to update your graphics drivers.
Check For Updates
First, check for available updates for your graphics drivers. Open your Device Manager. Right-click on your desktop and select ‘Device Manager’ from the menu. In the Device Manager, expand the ‘Display adapters’ section. Right-click on your graphics card and select ‘Update driver’. Choose ‘Search automatically for updated driver software’. Your system will search for available updates.
Install Latest Drivers
If updates are found, follow the prompts to install them. If no updates are found, visit the website of your graphics card manufacturer. Download the latest drivers for your specific graphics card model. Run the downloaded file and follow the installation instructions. After installation, restart your computer. This can help your Acer monitor recognize the input signal.

Credit: www.drivereasy.com
Reset Monitor Settings
Experiencing an “Input Not Supported” message on your Acer monitor can be frustrating. Resetting the monitor settings is a good way to fix this issue. This process can help to restore your monitor to its default settings, which might resolve the error message. Below, we’ll explore two ways to reset your Acer monitor: Factory Reset and Custom Reset Options.
Factory Reset
A factory reset will restore your monitor to its original settings. This can solve many display issues, including the “Input Not Supported” error. To perform a factory reset, follow these steps:
First, press the “Menu” button on your monitor. This button is usually located on the front or side of the monitor. Use the arrow buttons to navigate to the “Settings” menu. Then, look for an option labeled “Factory Reset” or “Reset to Default.” Select this option and confirm the reset. Your monitor will restart with its original settings.
Custom Reset Options
In some cases, you may not need to perform a full factory reset. Custom reset options allow you to adjust specific settings that might be causing the problem. Start by accessing the monitor’s menu using the “Menu” button. Navigate to the “Settings” menu and look for options like “Resolution,” “Refresh Rate,” or “Input Source.”
Make sure the resolution matches the recommended settings for your monitor. Adjust the refresh rate to a compatible level. If you’re using multiple input sources, ensure the correct one is selected. These adjustments can often solve the “Input Not Supported” error without a full reset.
Test With Another Monitor
Experiencing an “Input Not Supported” error on your Acer monitor can be frustrating. One effective troubleshooting step is to test with another monitor. This helps determine if the issue lies with the Acer monitor or your computer.
Connect Alternate Monitor
First, find another monitor and connect it to your computer. Use the same cables and ports that you used with your Acer monitor. Ensure the alternate monitor is powered on.
Observe if the alternate monitor displays correctly. If the image appears as expected, the problem may be with your Acer monitor. If the same error shows up, the issue might be with your computer settings or hardware.
Compare Results
Now, compare the results from both monitors. Did the alternate monitor work without issues? This suggests that your Acer monitor might need adjustments or repairs.
If both monitors show the same error, check your computer’s graphics card settings or consider updating your drivers. This comparison helps pinpoint the exact problem source, making it easier to find a solution.
Seek Professional Help
Sometimes, technical issues with your Acer monitor can be frustrating. If your monitor displays the message “Input Not Supported,” seeking professional help may be the best option. Experts can diagnose and fix the problem efficiently. Here’s how to get professional assistance:
Contact Support
First, reach out to Acer support. They can offer guidance over the phone or through online chat. Have your monitor’s model number ready. This helps the support team provide accurate solutions. They may ask you to try some troubleshooting steps. Follow their instructions carefully. If the issue persists, they might suggest other options.
Visit Service Center
If contacting support does not solve the issue, visit an authorized service center. Professionals there can examine your monitor in detail. They have the tools and expertise to fix hardware issues. Find the nearest service center on Acer’s official website. Book an appointment for quicker service. This ensures your monitor gets the care it needs.
Frequently Asked Questions
How Do I Fix My Monitor Not Detecting Input?
Check cable connections and ensure they are secure. Restart your computer. Update graphics drivers. Try a different cable or port. Adjust monitor settings.
Why Is My Acer Monitor Not Connecting To My Computer?
Check cable connections and ensure they are secure. Update your graphics drivers. Confirm the monitor is set to the correct input source. Restart your computer and monitor. If issues persist, try a different cable or port.
How Do I Change The Input On My Acer Monitor?
Press the “Input” button on your Acer monitor. Use the arrow buttons to select the desired input source. Press “Enter” to confirm.
How Do I Reset An Acer Monitor?
To reset an Acer monitor, press the “Menu” button, navigate to “Reset,” and select “Yes. ” The monitor will reset.
Conclusion
Resolving the “Input Not Supported” error on your Acer monitor is simple. Check your connections and update drivers. Adjust screen resolution settings as needed. These steps usually fix the issue. If problems persist, consult Acer support. Regular maintenance helps prevent future errors.
Keep your monitor software up-to-date. Enjoy a seamless viewing experience without interruptions.
