Yes, you can use a Samsung external hard drive on a Mac. It’s a simple process, but there are key steps to follow.
Connecting an external hard drive to your Mac can expand storage or facilitate file transfers. Samsung external hard drives are reliable and easy to use. This guide will help you understand how to connect and use your Samsung external hard drive on your Mac.
Whether you’re backing up data or transferring files, following these steps ensures smooth operation. Let’s dive in and explore how you can make the most out of your Samsung external hard drive with your Mac.

Credit: www.reddit.com
Initial Setup
Set up your Samsung external hard drive on a Mac by connecting the drive to your computer. Open Disk Utility to format the drive to Mac OS Extended (Journaled).
Setting up your Samsung External Hard Drive on a Mac is simple. Let’s break it down into easy steps.Unboxing And Inspecting The Drive
Start by carefully unboxing your Samsung External Hard Drive. Check that all items are present. Usually, the box includes the drive, a USB cable, and a user manual. Inspect the drive for any visible damage. Make sure the USB cable is in good condition.Connecting The Drive To Your Mac
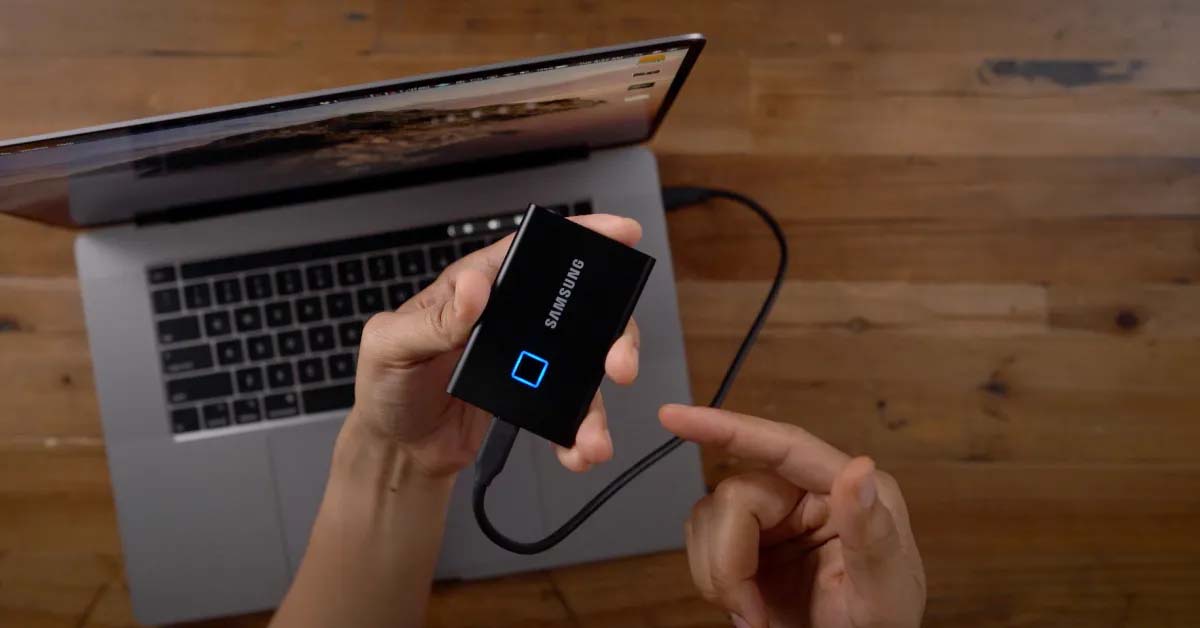
Plug one end of the USB cable into the drive. Connect the other end to your Mac’s USB port. Your Mac should recognize the drive immediately. If it doesn’t, check the connections. Ensure the drive is securely connected. Now, you are ready to proceed with formatting. “`
Credit: www.donemax.com
Formatting The Drive
Formatting the drive is essential for using a Samsung external hard drive on a Mac. This process ensures compatibility and optimal performance. Follow simple steps to format and start storing files efficiently.
Formatting your Samsung external hard drive on a Mac is crucial. It ensures compatibility and smooth operation. Follow these steps to format your drive correctly.Accessing Disk Utility
First, connect your Samsung external hard drive to your Mac. Open the “Applications” folder. Then, navigate to the “Utilities” folder and open “Disk Utility”. This tool helps manage your drives.Choosing The Right Format
In Disk Utility, select your Samsung external hard drive from the list. Click on the “Erase” tab. Here, you need to choose a format. For most users, “ExFAT” is a suitable choice. It works on both Mac and Windows. If the drive is only for Mac use, select “Mac OS Extended (Journaled)”. Finally, click “Erase” to format the drive.Partitioning The Drive
Partitioning the drive helps in organizing data on your Samsung external hard drive. This makes it easier to use on a Mac. Follow simple steps to create separate sections for different files.
Partitioning your Samsung external hard drive on a Mac can be useful. It helps you organize your files better. You can separate work files from personal files. This makes finding your data easier and faster.Creating Partitions
To create partitions, connect your Samsung hard drive to your Mac. Open the Disk Utility app. You can find it in the Applications folder under Utilities. Select your Samsung hard drive from the list on the left. Click the “Partition” button at the top of the window. A pie chart will appear, showing your drive’s current space. Click the “+” button below the chart. This will add a new partition. You can adjust its size by dragging the divider line. Give your new partition a name. Choose a format like “Mac OS Extended (Journaled)”. Click “Apply” to create the partition. Your drive may take a few minutes to partition. Once done, you will see your new partitions in Finder.Managing Multiple Partitions
Managing multiple partitions is simple. Go to Disk Utility. Select your Samsung hard drive. You will see all your partitions listed. You can rename them to keep things organized. If you need to delete a partition, select it in Disk Utility. Click the “-” button below the pie chart. Confirm the deletion. Be careful, deleting a partition erases all its data. You can also resize partitions. Select the partition you want to resize. Drag the divider line to adjust its size. Click “Apply” to save changes. This is useful if you need more space in one partition. Managing multiple partitions helps keep your data organized. It also makes backups easier. You can back up one partition without affecting others. “`Transferring Files
Transferring files between your Samsung external hard drive and Mac can be a smooth process once you know the right methods. Whether you are moving photos, documents, or large video files, understanding the different approaches can make your life easier. Let’s dive into two practical ways to transfer files: the Drag and Drop Method and Using Finder.
Drag And Drop Method
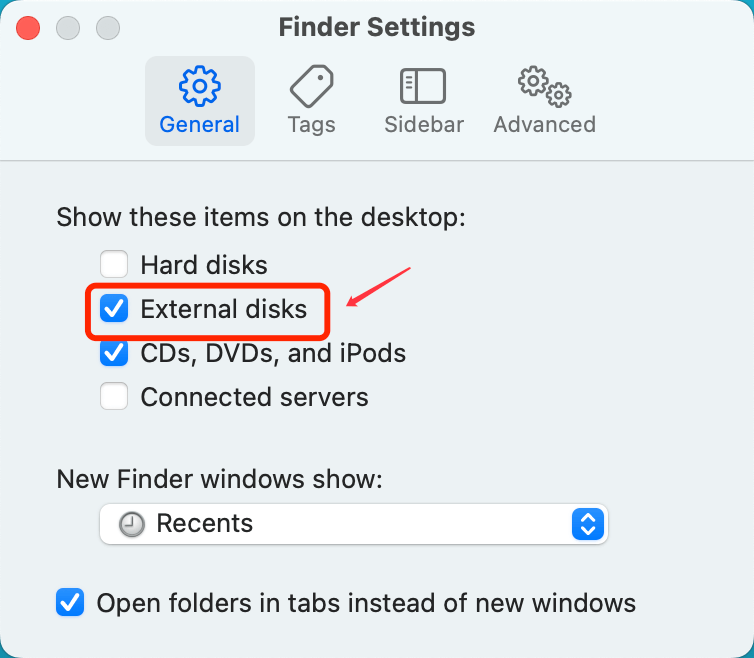
The simplest way to transfer files is by using the drag and drop method. Start by connecting your Samsung external hard drive to your Mac using a USB cable. Once connected, an icon representing the external hard drive will appear on your desktop.
Open the folder containing the files you want to transfer. Click and hold the file you wish to move, then drag it to the external hard drive icon on your desktop. Release the mouse button to drop the file onto the external hard drive. It’s that easy!
Keep an eye on the transfer progress. Larger files may take a bit longer to move. Once the transfer is complete, you can safely eject the external hard drive by dragging its icon to the Trash or by using the eject button in Finder.
Using Finder
Another efficient way to transfer files is by using Finder. Connect your Samsung external hard drive to your Mac and wait for the drive to appear in the Finder sidebar under “Locations”.
Open a new Finder window, navigate to the files you want to transfer, and select them. You can select multiple files by holding down the “Command” key while clicking each file.
With the files selected, drag them to the external hard drive listed in the Finder sidebar. Alternatively, you can copy the files using “Command + C” and paste them into the external hard drive using “Command + V”. This method provides a clear view of your file structure, making it easier to organize your transfers.
Remember to monitor the transfer progress in Finder. Once the files are successfully transferred, eject the external hard drive properly to avoid data corruption.
Have you ever lost important data because you didn’t transfer it correctly? Share your experiences and tips in the comments below!
Backup Solutions
Samsung external hard drives are a great way to store and secure your valuable data. If you use a Mac, you might be wondering how to best utilize these drives for backups. This section will guide you through various backup solutions, ensuring your data remains safe and accessible.
Using Time Machine
Time Machine is Apple’s built-in backup feature that works seamlessly with external hard drives, including those from Samsung. To set it up, connect your Samsung external hard drive to your Mac.
Next, go to “System Preferences” and select “Time Machine”. Click “Select Backup Disk” and choose your Samsung drive from the list. Time Machine will automatically start backing up your data at regular intervals.
One of the best things about Time Machine is its simplicity. It works in the background, so you don’t have to worry about manually backing up your files. Have you ever accidentally deleted an important file? With Time Machine, you can easily recover it from a previous backup.
Third-party Backup Software
If you prefer more control over your backups, third-party software might be the way to go. Several options are available that offer advanced features not found in Time Machine.
Software like Carbon Copy Cloner or SuperDuper! allow you to create bootable backups. This means if your Mac’s internal drive fails, you can boot directly from your Samsung external hard drive. It’s like having a spare tire for your computer.
These programs also offer flexible scheduling and incremental backups. You can set them to run at specific times and only back up files that have changed since the last backup. This saves space and ensures your backup process is efficient.
Have you used third-party software before? If not, it’s worth exploring these options to see if they better meet your needs. They might offer features that make your backup process more robust and reliable.
In conclusion, whether you choose Time Machine or third-party software, the key is to make regular backups. Your data is valuable, and taking these steps ensures it’s protected. What backup solution do you find most effective? Share your thoughts in the comments!
Troubleshooting
Samsung external hard drives can be easily used on Mac by formatting them to a compatible file system. Ensure the drive is correctly connected and recognized. Check for required drivers or software updates to enhance compatibility.
Using a Samsung external hard drive on a Mac can sometimes be tricky. Problems can arise, leaving users frustrated. This section will help you troubleshoot common issues. Follow these steps to get your drive working smoothly.Drive Not Recognized
Your Mac might not recognize the Samsung external hard drive. First, check the USB connection. Ensure the cable is properly plugged in. Try using a different USB port. If the drive still isn’t recognized, try another USB cable. Next, open Disk Utility on your Mac. Check if the drive appears there. If it does, but is greyed out, click on it and select “Mount.” If the drive does not appear, reboot your Mac. This can often solve the issue. If the drive is still not recognized, check for software updates. Ensure macOS is up to date. Sometimes, compatibility issues can cause recognition problems. Updating macOS can fix these issues.Data Recovery Options
If your Samsung external hard drive still isn’t working, you might worry about data loss. Don’t panic. There are several data recovery options available. First, try using Disk Utility’s First Aid feature. Open Disk Utility, select your drive, and click “First Aid.” This tool can repair minor disk errors. If this doesn’t work, consider third-party data recovery software. There are many reliable options available. Choose one that works well on Mac. Another option is to contact a professional data recovery service. They can recover data from damaged or unrecognized drives. This service can be expensive, but it may be worth it if your data is crucial. Remember, regular backups can prevent data loss. Always back up important files to avoid future issues. “`Safety Tips
Using a Samsung external hard drive with your Mac can be very convenient. Yet, it’s important to keep your data safe. Here are some simple safety tips to protect your valuable files.
Ejecting The Drive Properly
Always eject your Samsung external hard drive the right way. Do not just unplug it. Click on the drive icon on your desktop. Then, choose “Eject” from the menu. Wait for the notification that it’s safe to remove the drive. This helps avoid data loss and drive damage.
Protecting Your Data
Backing up your data regularly is crucial. Use Time Machine on your Mac to back up your files automatically. Also, consider encrypting your drive. This adds another layer of protection in case the drive is lost or stolen. Finally, avoid physical damage by storing the drive in a safe place. Keep it away from liquids and extreme temperatures.

Credit: www.donemax.com
Frequently Asked Questions
Are Samsung Hard Drives Compatible With Mac?
Yes, Samsung hard drives are compatible with Mac. They work seamlessly with macOS after formatting to the appropriate file system.
How Do I Get My Mac To Recognize My External Hard Drive?
Connect the external hard drive to your Mac. Open “Disk Utility” from Applications > Utilities. Select your drive and click “Mount”.
How Do I Get My External Hard Drive To Work On My Mac?
Connect the external hard drive to your Mac. Open “Disk Utility” from the Applications folder. Select your drive, then click “Mount. “
How Do I Make My External Hard Drive Compatible With My Mac?
Format the external hard drive to Mac’s file system. Open Disk Utility, select the drive, and choose “Erase”. Select “Mac OS Extended (Journaled)” or “APFS”, then click “Erase” to format. The drive will now be compatible with your Mac.
Conclusion
Using a Samsung external hard drive on a Mac is simple. Follow the steps mentioned for a smooth experience. Connect the drive, format correctly, and transfer files easily. This guide helps you avoid common issues. Now, you can manage your data effortlessly.
Keep your files organized and secure. Enjoy the benefits of additional storage. Your Mac and Samsung hard drive work well together. Happy computing!
