Reformatting a Western Digital hard drive for Mac is straightforward. It ensures the drive works seamlessly with your Mac system.
Many users face challenges when switching from Windows to Mac. Understanding the reformatting process can save you time and effort. Whether you use the drive for backups, media storage, or other tasks, proper formatting is crucial. This guide provides clear steps to help you through the process.
No technical expertise required. Just follow along, and you’ll have your hard drive ready in no time. Let’s dive into the simple steps to reformat your Western Digital hard drive for your Mac.

Credit: www.donemax.com
Table of Contents
TogglePreparing Your Mac
Reformatting a Western Digital hard drive for Mac involves using Disk Utility. Start by connecting the hard drive to your Mac. Open Disk Utility, select the drive, and choose the format option.
### Preparing Your Mac Before you reformat your Western Digital hard drive for your Mac, it’s essential to get your computer ready. Taking the time to prepare ensures a smooth process and helps avoid any potential data loss or hardware issues. Let’s dive into the steps you need to follow.Check System Requirements
First, make sure your Mac meets the system requirements for reformatting the drive. Your Mac should be running at least macOS 10.13 (High Sierra) or later versions. To check your macOS version, click on the Apple menu in the top-left corner and select “About This Mac.” A window will pop up showing your current macOS version. If you need to update, follow the on-screen instructions after clicking “Software Update.” Ensure your Mac has enough battery life or is connected to a power source. Reformatting can take some time, and you don’t want your Mac to shut down in the middle of the process.Backup Important Data
Backing up your data is crucial. Reformatting will erase everything on your Western Digital hard drive, so you need to ensure your important files are safely stored elsewhere. You can use Time Machine, Mac’s built-in backup feature, to make a full backup of your system. Connect an external drive, go to System Preferences, and click on Time Machine. Follow the prompts to set up your backup. Alternatively, use cloud storage services like iCloud, Google Drive, or Dropbox. Simply drag and drop your important files to these services for an additional layer of protection. Consider creating a list of the files you’re backing up. This helps you double-check that you haven’t missed anything vital. Taking these steps now can save you a lot of stress later on. How do you feel about your data security? Are there other backup methods you trust more?
Credit: www.easeus.com
Connecting The Hard Drive
To reformat your Western Digital hard drive for Mac, you need to connect it properly first. This step ensures that your Mac recognizes the drive, allowing you to proceed with reformatting. Here are the key steps to follow:
Use Proper Cables
Make sure you have the correct cables. Western Digital hard drives usually come with a USB or Thunderbolt cable. Check the port type on your Mac and match it with the cable you have. If the cable does not fit, you may need an adapter.
Using the proper cables guarantees a stable connection. It also helps in transferring data efficiently. Incorrect cables can cause issues, so double-check before connecting.
Verify Connection
Once you have the right cables, connect the hard drive to your Mac. Ensure the connections are secure. Loose connections can lead to errors or the drive not being recognized.
After connecting, look for the hard drive icon on your desktop. If it appears, your Mac has recognized the drive. If not, check the connection again. You might need to restart your Mac or reconnect the cables.
Opening Disk Utility
Reformatting a Western Digital hard drive for your Mac can seem daunting at first. But with a few simple steps, you can get it done in no time. The first step is opening Disk Utility, a powerful tool built into macOS.
Accessing Disk Utility
To start, click on the Spotlight icon in the upper right corner of your screen. Type “Disk Utility” into the search bar and press Enter. You should see Disk Utility pop up as a result—click on it to open the app.
Alternatively, you can find Disk Utility through the Applications folder. Navigate to Applications > Utilities > Disk Utility. Either method works perfectly, so choose the one you find easiest.
Understanding Disk Utility Interface
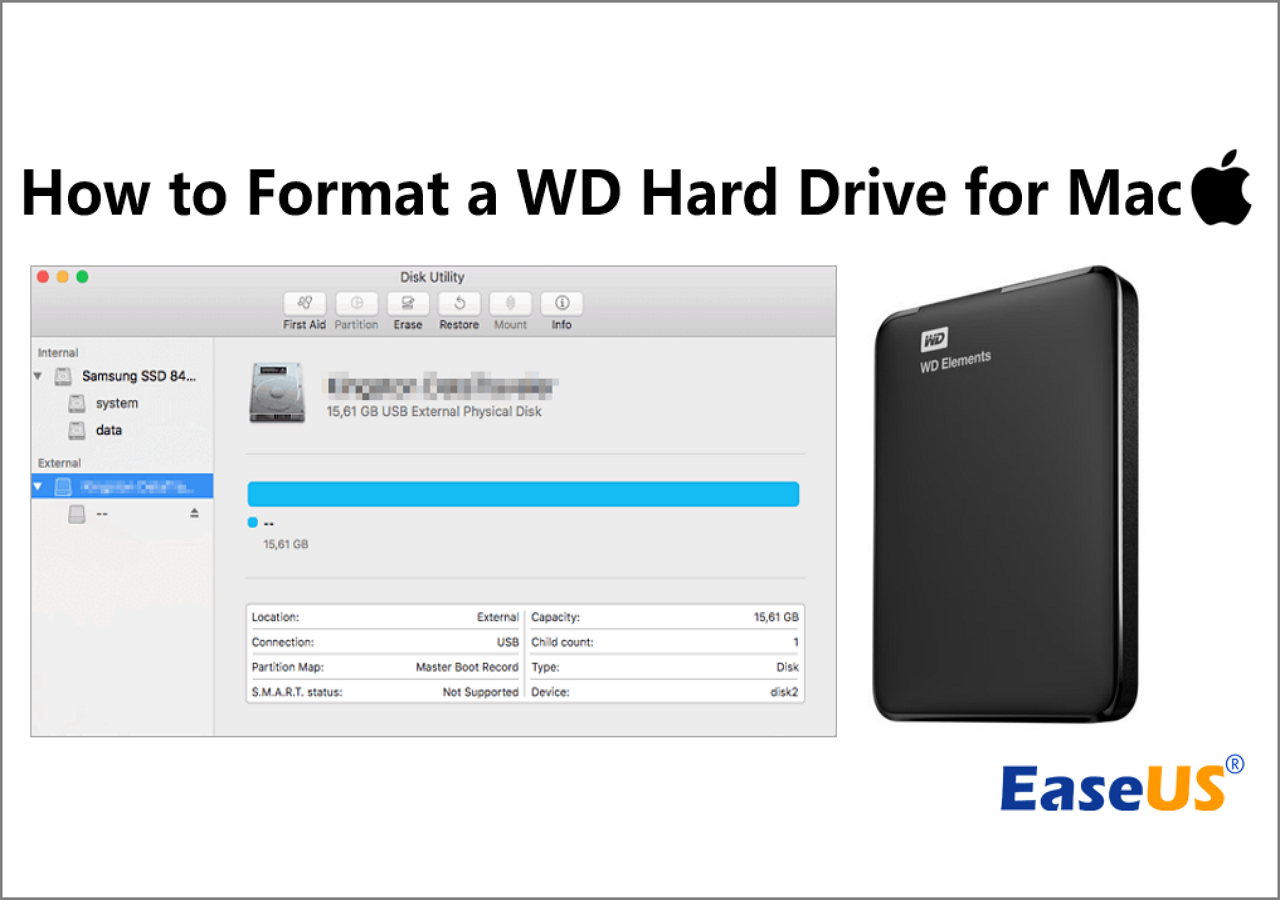
Once you open Disk Utility, the interface might seem a bit overwhelming. But don’t worry, it’s simpler than it looks. On the left side, you’ll see a list of all your connected drives and partitions.
Find your Western Digital hard drive on this list. Click on it to highlight it. The main panel will then display information about the selected drive, including its capacity and current format.
At the top of the window, you’ll see several buttons like “First Aid”, “Partition”, and “Erase”. These are the tools you will use to reformat your drive. But before you click anything, take a moment to familiarize yourself with these options.
Have you ever wondered why Macs use a different file system than Windows? It’s all about optimizing performance and compatibility with macOS. Knowing this can help you appreciate why reformatting is necessary.
Now that you have Disk Utility open and understand its interface, you’re ready to move on to the next steps. What unexpected challenges have you faced while working with external hard drives? Share your thoughts and stay tuned for the next section on how to erase and reformat your drive!
Selecting The Hard Drive
Reformatting a Western Digital hard drive for Mac is simple. Connect the drive, open Disk Utility, and select “Erase. ” Choose the desired format and confirm. Your hard drive is now ready for use with your Mac.
### Selecting the Hard Drive When you’re planning to reformat your Western Digital hard drive for a Mac, selecting the right drive is crucial. This step ensures you don’t accidentally erase important data from another device. Let’s walk through the process, focusing on how to identify and highlight your hard drive. ###Identify Your Hard Drive
First, connect your Western Digital hard drive to your Mac. Open the Finder and navigate to the “Applications” folder. From there, open the “Utilities” folder and click on “Disk Utility.” In Disk Utility, you’ll see a list of all the drives currently connected to your Mac. Your Western Digital hard drive should appear under the “External” section. Check the name and storage capacity to ensure you’ve identified the correct drive. If you’ve given your drive a unique name, this will make it easier to spot. ###Highlight The Drive
Once you’ve identified your Western Digital hard drive, click on it to highlight it. This action selects the drive and displays its information in the main window of Disk Utility. Double-check the details to confirm you’ve selected the correct drive. Look for the drive’s name, storage capacity, and format type. Highlighting the correct drive is essential to avoid formatting the wrong device. Ever accidentally deleted a file and wished you could undo it? Highlighting the drive correctly can save you from that stress. Taking a moment to confirm your selection can prevent irreversible data loss. How careful are you when managing your data? By paying attention to these details, you ensure a smooth and safe reformatting process for your Western Digital hard drive on your Mac.Erasing The Hard Drive
Erasing the hard drive is a crucial step when reformatting your Western Digital hard drive for Mac. This ensures all previous data is removed, allowing you to start fresh. Let’s dive into the essential steps to make this process seamless.
Choose Erase Option
First, connect your Western Digital hard drive to your Mac. Open the Disk Utility application. You’ll find this under Applications > Utilities.
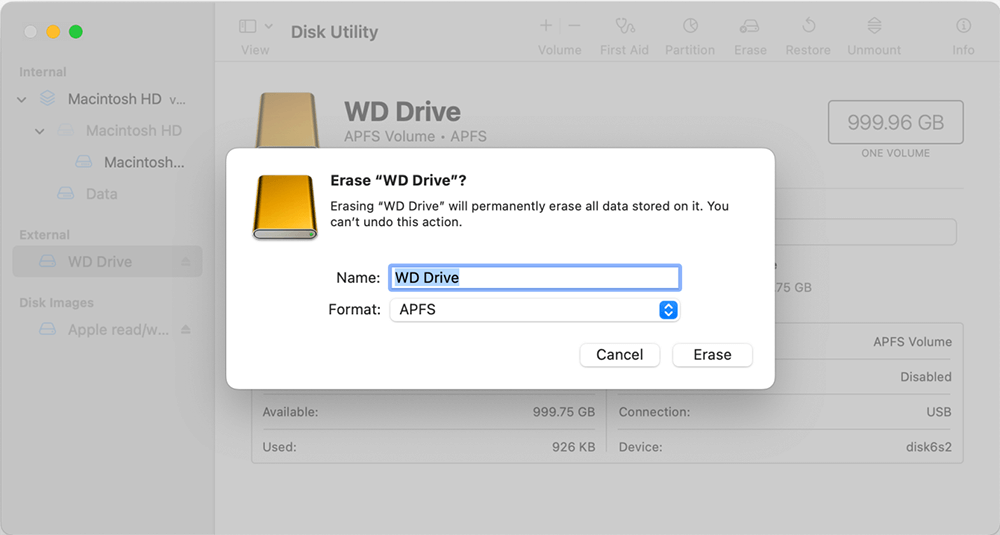
Select your hard drive from the list on the left. It’s important to choose the correct drive to avoid erasing the wrong one. Once selected, click on the “Erase” button at the top of the window.
Set Format And Scheme
In the Erase window, you’ll see options for “Name,” “Format,” and “Scheme.” You can name your drive anything you like, so pick something memorable.
For Format, select “Mac OS Extended (Journaled)” if you want to use the drive exclusively with Mac. If you also need compatibility with Windows, choose “ExFAT.”
Under Scheme, select “GUID Partition Map.” This is essential for the drive to work correctly with your Mac. Once you’ve set everything, click “Erase” to start the process.
Have you ever accidentally formatted the wrong drive? Double-checking your selections can save you from a lot of trouble. These simple steps ensure your hard drive is ready for whatever you need next.

Credit: www.youtube.com
Reformatting Process
Reformatting your Western Digital hard drive for a Mac can seem daunting, but it’s a straightforward process. Whether you’re repurposing an old drive or ensuring compatibility with your Mac, reformatting is essential. Let’s break down the process into manageable steps to make it easier for you.
Initiate Reformatting
First, connect your Western Digital hard drive to your Mac. Open the Finder, and navigate to the “Applications” folder. From there, go to “Utilities” and open “Disk Utility.”
In Disk Utility, you’ll see a list of all connected drives on the left-hand side. Select your Western Digital hard drive from this list. Click the “Erase” button at the top of the window. This action will open a new dialog box.
Here, you’ll need to choose a format for your drive. If you plan to use the drive exclusively with Mac, select “Mac OS Extended (Journaled).” For cross-platform compatibility, “exFAT” is a good option. Once you’ve chosen the format, give your drive a name and click “Erase.”
Monitor Progress
After initiating the reformatting, you’ll see a progress bar indicating the status. This process usually takes a few minutes. During this time, avoid disconnecting the drive or shutting down your Mac.
Once the reformatting is complete, a confirmation message will appear. You can now safely eject your drive by selecting it in Finder and clicking the eject button.
Isn’t it satisfying to know you’ve successfully reformatted your hard drive? Reflect on what you plan to store on your newly formatted drive. Your Mac will now recognize and work seamlessly with the drive.
Have you ever encountered issues while reformatting? Share your experiences and tips in the comments below. Your insights could help someone else navigate this process with ease.
Completing The Setup
Completing the setup of your Western Digital hard drive for Mac is crucial. This ensures your drive is ready to use without any issues. Follow these final steps for a smooth experience.
Verify Reformatting
First, check if the reformatting process was successful. Open “Finder” on your Mac. Locate the external drive under “Devices”. Click on the drive to access its contents. Ensure it opens without errors. If it does, the reformatting was successful. You can now use the drive for your Mac files.
Safely Eject The Drive
Next, safely eject the drive to avoid data corruption. Click on the “Eject” icon next to your drive’s name in Finder. Wait for the prompt that says it’s safe to remove the drive. Physically disconnect the drive from your Mac. Always eject properly to keep your data safe.
Troubleshooting Tips
Reformatting a Western Digital hard drive for Mac can sometimes come with its own set of challenges. While the process is usually straightforward, unexpected issues can arise. Here are some troubleshooting tips to help you navigate any bumps along the way.
Common Issues
One common issue is that your Mac may not recognize the hard drive. This could be due to outdated software or a faulty cable connection. Ensure your macOS is up to date and try using a different cable or USB port.
Another problem you might encounter is the inability to format the drive. This can happen if the drive is write-protected. To resolve this, you can use the Terminal app to disable write protection by typing diskutil list to find your disk, followed by diskutil unmountDisk /dev/diskX, replacing ‘X’ with your disk number.
Sometimes, the reformatting process gets stuck or takes too long. This could indicate bad sectors on the hard drive. Use the Disk Utility’s First Aid feature to check and repair the disk. If the problem persists, consider using a dedicated disk repair tool.
Seeking Support
If you’ve tried these solutions and the issues still persist, it might be time to seek support. Western Digital offers customer support that can be reached through their website. They provide step-by-step guides and direct assistance for troubleshooting.
You can also explore online forums and communities. Often, other users have faced similar problems and can offer practical advice. Websites like Apple Support Communities and MacRumors are good places to start.
Remember, sometimes the simplest solutions are the most effective. Don’t hesitate to restart your Mac or reconnect the hard drive. It’s easy to overlook these basic steps, but they can solve many issues quickly.
What has been your experience with reformatting hard drives? Have you faced any unexpected challenges? Share your thoughts and tips in the comments below!
Frequently Asked Questions
How To Reformat Wd Hard Drive On Mac?
Open Disk Utility, select your WD hard drive, click “Erase”, choose format type, and confirm.
How Do I Wipe And Format An External Hard Drive For Mac?
To wipe and format an external hard drive for Mac, open Disk Utility, select the drive, click Erase, choose format type, and confirm.
How Do I Wipe My Western Digital Hard Drive?
Use Western Digital’s Data Lifeguard software to securely wipe your hard drive. Download, install, and follow the on-screen instructions. Ensure data backup first.
How Do I Get My Mac To Recognize My Wd External Hard Drive?
Connect the WD external hard drive to your Mac. Open Disk Utility from Applications > Utilities. Select the drive and click “Mount”. If not recognized, format the drive to Mac-compatible file system (APFS or HFS+). Ensure macOS is up to date.
Conclusion
Reformatting your Western Digital hard drive for Mac is simple. Follow the steps outlined to ensure success. Be patient and careful with each step. This process keeps your data safe and your drive working smoothly. Now, your hard drive is ready for all your Mac tasks.
Enjoy the seamless experience and better performance. Happy computing!
“I’m someone who loves trying out all the newest tech gadgets! I spend a lot of time testing things like phones, tablets, and computers & accessories. I look at everything carefully and tell you exactly what I think, good or bad. I’ve been doing this for a long time, so I know a lot about how these things work. I want to help you decide if a gadget is really worth your money!”
